Wednesday, March 27, 2013
PTU: SpringMagick

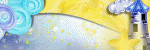
Tut: Spring Magick
Tut By: KillerKitty
Written on: 3/27/13
This tut was written by me on 3/27/13, any similarity to any other tut or tag is purely coincidental.
This tut is written using Photoshop CS5, but should work with CS1 and up. This tut is written for Intermediate.
Supplies:
Kit: Spring Magick by Irish Princess Designs (Available Here)
Tube: Kelly by VeryMany (Available Here)
Mask: DBV Mask 149 by Designs by Vaybs(Available Here)
Font: Selfish (Available Here)
Filter: ColorDot by penta.com (Available Here)
TUTORIAL:
Open a new canvas. 700 by 700. Open DBV Mask 149, and paper 5. Move Paper 5 over to the Mask, and hide the paper layer. If you hold down shift while moving the paper over then it will automatically center. Do what needs to be done for the mask, then right click and apply mask, and move it all over to the blank canvas. (If you don't remember how to make masks on PS go here.) Hold shift while dragging it over to center it. Open frame 1, move it to the canvas holding shift, and then Ctrl+T and change it to 75% of the original size, then -19 degrees.
Open Paper 7, move it to the canvas under the frame, Magic Wand tool the frame, and expand it by 5 px. Select inverse and delete on Paper 7. Open Kelly tube, and move the close up over to the canvas, between paper 7 and frame 1, and copy it twice. Make a clipping mask with each of the layers and then change each layer blend mode to following from the bottom up: Luminosity - Screen - Screen. On the top Close up layer go to Gaussian blur and put it to 10 px. Merge those layers and go to the penta.com filter ColorDot and put the distance to 10. Now add the tube itself, and place it wherever you want. I placed it to the right side of the frame. Now it's time to start adding elements. Be creative!!
Now its time to add some text. I am using color "b96282", and I added these layer effects: Stroke 2 px, Inner Glow size 3, Bevel And Emboss Angle 120 and Altitude 70. If you want some glitter, you could make a layer above the text, flood fill with your color and add noise. I did 35 as my setting. Now the tag is a bit big so, bust out your crop tool, make sure you don't cut anything off. If you want it any smaller go ahead and do that under Image Size. I am okay with how big mine is. So add your License and save!
Hope you enjoyed this tutorial!

Thursday, March 14, 2013
PTU: HeartBreaker

Tut: HeartBreaker
Tut By: KillerKitty
Written on: 3/14/13
This tut was written by me on 3/14/13, any similarity to any other tut or tag is purely coincidental.
This tut is written using Photoshop CS5, but should work with CS1 and up. This tut is written for beginners.
Supplies:
Kit: HeartBreaker by Alikas Scraps (Available Here)
Tube: Audry by VeryMany (Available Here)
Template: 414 by MissyMinx (Available Here)
Mask: DBVMask 155 by Designs By Vaybs (Available Here)
Font: Mathilde (Available Here)
TUTORIAL:


Copy that paper layer and move it above the Circle 3 layer and make another clipping mask.

Now open paper 13 and move it over to our canvas, and move the layer all the way down above Square 1 layer. Ctrl+T and resize to 40%, and then create a clipping mask. Copy that layer and move it above the square 2 layer and make a clipping mask with that one too.

Open Paper 6 and move it above Circle 2, resize to 45%, and then clipping mask. Now open paper 3, resize to 8%, move it above frame back, clipping mask. Copy the layer two more times, and move each layer above frame back 2 and 3, and then do another clipping mask.


Now open up the tube of your choice. Mine being Audry. I move her over to my canvas layer. I resize her around 45%. Now as you can see where I placed her I need to resize my canvas. Simple and quick to do. Go to Image --> Canvas Size oooooor you could hit Alt+Ctrl+C. I just changed the height to 600 to give me some room to play around in.

Now I am going to go back to my tube file and bring out the close up. I am going to move her onto my canvas. I turn off the first tube layer so I can move the close up around. I have a fondess for really big close ups because I love eyes, and random little stuff like necklaces. I am going to have those be focused on in the frame boxes. I copy the close up 3 times, and move them above the layers that I want, and clipping mask. (I love that clipping mask if you couldn't tell.)

Since I loved the texture of that paper on the frames, I am going to bring that through with these layer blends. Copy all three close ups. The first close up layer above the paper you are going to change to "Overlay" the second layer is going to be "Color."

Go and open as08, move it below the bottom layer, resize to 52%, and put it towards the left of the canvas. Copy, rotate 180 and put it on the opposite side.

Now open up as many elements as you want and move them around the canvas. Go ahead be creative!

Now we open up the mask we are going to use. DBVMask 155. Do you remember how to do masks? If not, check out my first tut on this blog. I flood filled the layer with strait up white, because I love sparkles. I moved it right above the circle layers. I copied it, and here's what I got.

Time to bust out the text tool. I used the FTU Font Mathilde. 100 pts, bold. Type out the name, put it wherever you want. I used this color (cc2473) and this color (766091). I made the vowels the purple and consonets the pink. I copyed the layer, rasterized, and added noise. I then clipping masked the layer. Then layer effects on the bottom text layer. Bevel with these settings, and stroke, black, 2 px.

Resize if needed, add your license, crop, making sure you don't cut off anything. Then save!
That's it! Hope you enjoyed this tutorial.
Subscribe to:
Posts
(Atom)
About Me

- KillerKitty
- I love to play with Photoshop/Paint Shop Pro. I am an amateur (seriously) graphics artist.
I CT For